
In this post, I want to run through how to do field validation in Power Apps canvas apps/custom pages, and the different options that are available. The ultimate goal is to provide the best user experience when validating fields, and what to watch out for.
The Scenario
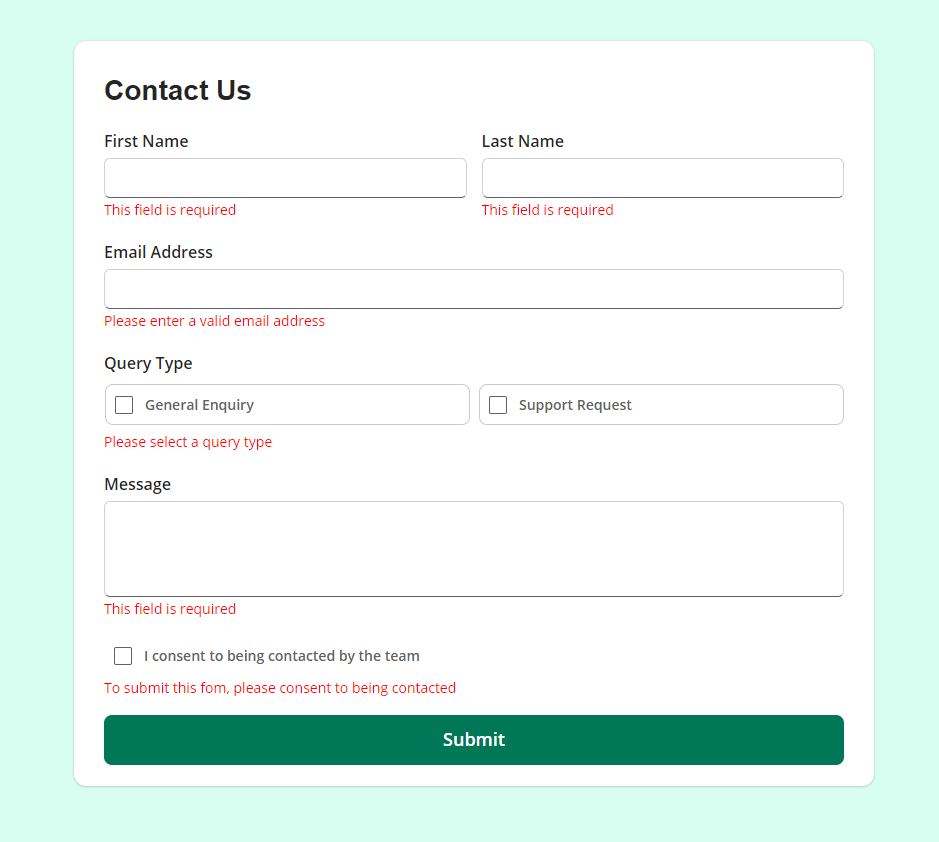
A contact us form has been developed in Canvas Apps for a large organisation. This form has mandatory fields that need to be filled in, as well as some fields that require a specific input type. The form needs to be updated to include these validation checks.
The form was developed using the frontend mentoring challenge contact us form as inspiration. Curious how I built this? Let me know!
validation
Lets look at some basic forms of validation against different field types.
Text inputs
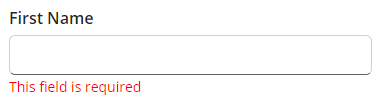
Validating an input field that is required in it's most basic form is relatively straightforward. You will want to check if the field is empty and if it isn't show the error message.
There are various valid ways to do this, however I tend to use the Len() function in the visible property of the error label to check if the field length is equal to 0. If it is, then show the error.
To achieve this we can use the following formulas on the relevant fields.
Error label visible set to:
Len(txtfirstName.Value) = 0The email field is slightly different. We need to validate it if it's empty, but also validate it if it isn't empty and it isn't a valid email address.


The following formula can be used on the label's visible property here:
Len(txtEmail.Value) = 0 Or Not IsMatch(TxtEmail.Value, Match.Email)
The text displayed in the error message should change dynamically based on whether it's empty or if it's not empty, that it's a valid email address. To do this, on the error label's text property, set it to the following:
If(IsBlank(txtEmail.Value), "This field is required", Not IsMatch(txtEmail.Value, Match.Email), "Please enter a valid email address")Checkboxes

For the above checkboxes, the error message will show when none of the boxes are ticked. This means the error label will need to check against both checkboxes:
Not chkGeneralEnquiry.Checked And Not chkSupportRequest.CheckedNote with the above, the "Not" clause is used as we can only check if the checkboxes are ticked(checked) rather than unchecked. There is also no need for an If() statement as the formula will evaluate to either true or false anyway.
Repeat the above steps for the other fields, and you will have a form that will fully validate depending on field inputs.
Awesome!
If you want to do alternative field validation for text, you can use the Match() function to validate different types of things. Check out the documentation on it here: https://learn.microsoft.com/en-us/power-platform/power-fx/reference/function-ismatch
Enhancing the user experience
Now we have the field validation working, the next steps are to consider how to make the user experience better. Ideally the error messages wouldn't show by default (for example if the user navigates to the form) rather, they should show on submit if there's an error, lets update the form to match this better experience.
The logic will remain the same, however it will need to be moved to the Submit button's OnSelect property. The logic would then update a variable, and the variable will control the error message visibility. Lets give it a go!
First and Last name validation
In the Submit button OnSelect, add the following code:
If(
    Len(txtFirstName.Value) = 0,
    UpdateContext({locShowFirstNameError: true}),
    UpdateContext({locShowFirstNameError: false})

);
If(
    Len(txtLastName.Value) = 0,
    UpdateContext({locShowLastNameError: true}),
    UpdateContext({locShowLastNameError: false})

);
In the visible property of the first and last name error labels, change it to locShowFirstNameError and locShowLastNameError respectively.
Email Validation
If we add the following to the button's OnSelect, we get the email address validation checking if the field is blank and if it's not blank, validating whether it's a valid email address.
If(
    Len(txtEmail.Value) = 0 Or
    Not IsMatch(txtEmail.Value, Match.Email),
    UpdateContext({locShowEmailAddressError: true}),
    UpdateContext({locShowEmailAddressError: false})
);
Set the error label's visible property to be locShowEmailAddressError.
Checkbox validation
To validate the query type checkboxes, add the following to the buttons OnSelect:
If(
    Not chkGeneralEnquiry.Checked And
    Not chkSupportRequest.Checked,
    UpdateContext({locShowQueryTypeError: true}),
    UpdateContext({locShowQueryTypeError: false})
);
Then update the Query type error label visible property to locShowQueryTypeError
Bringing it together
The full code on the Submit button's OnSelect will now look like this (including validation for the "Message" field and the "I consent to being contacted by the team" fields).
//First name validation
If(
    Len(txtFirstName.Value) = 0,
    UpdateContext({locShowFirstNameError: true}),
    UpdateContext({locShowFirstNameError: false})

);
//Last name validation
If(
    Len(txtLastName.Value) = 0,
    UpdateContext({locShowLastNameError: true}),
    UpdateContext({locShowLastNameError: false})

);
//Email vlidation
If(
    Len(txtEmail.Value) = 0 Or
    Not IsMatch(txtEmail.Value, Match.Email),
    UpdateContext({locShowEmailAddressError: true}),
    UpdateContext({locShowEmailAddressError: false})
);
//Query type validation
If(
    Not chkGeneralEnquiry.Checked And
    Not chkSupportRequest.Checked,
    UpdateContext({locShowQueryTypeError: true}),
    UpdateContext({locShowQueryTypeError: false})
);
//Message validation
If(
    Len(txtMessage.Value) = 0,
    UpdateContext({locShowMessageError: true}),
    UpdateContext({locShowMessageError: false})
);
//Consent validation
If(
    Not chkConsent.Checked,
    UpdateContext({locShowConsentError: true}),
    UpdateContext({locShowConsentError: false})
);
Each error label will need to have the correct variable added to the visible property for this to work.
Now, lets see this in action!
Hopefully this has been a helpful introduction into how to validate fields in PowerApps Canvas apps and Custom pages.

Member discussion: